COMPLETE INSTALLATION OF MICROSOFT DYNAMICS AX
Contents
1.
Check
prerequisites

1.
Install
the Microsoft Dynamics AX databases
1.
Start Microsoft Dynamics AX Setup. Under Install, select Microsoft
Dynamics AX components.

2. Advance through the first wizard pages.


5. The Select a file location page opens. I leave the default File Location value (C:\Program Files\Microsoft Dynamics AX \60) (This page opens only if you run installation for the first time)


8. The Select installation type page opens. To see what will be installed, select the Custom installation type radio button.


3. Install an Application Object Server (AOS) instance


4.
Install
Reporting Services extensions for Microsoft Dynamics AX


5. Configure
Analysis Services by running Setup


6.
Install
.NET Business Connector:


7.
Install
a client

4. On the Prerequisite validation results page, resolve any errors. For more information about how to resolve prerequisite errors, see the Check prerequisites section. When no errors remain, click Next.


8.
Install
the version of the Data Import/Export Framework that is available in AX 2012 R3


2. A prerequisite validation check runs. Address any issues that the prerequisite check finds outside the installer, and then restart the validation check. When all prerequisites have been found, click Next


9.
Install
Enterprise Portal on a single server


10.
Install
Retail Headquarters components in AX 2012 R3


11.
Install
Retail POS


12.
Install
Commerce Data Exchange: Async Server


13.
Install
Retail SDK


14.
Install
Commerce Data Exchange: Async Client


1.
Check
prerequisites
Applies
to: Microsoft Dynamics AX 2012 R3 Run the prerequisite validation
utility for Microsoft Dynamics AX to determine whether a computer meets the
requirements to install a Microsoft Dynamics AX component. You can run the
utility before you install any components in your environment. If requirements
are not met, the utility helps you install or configure most prerequisites.
Additionally, you can view or print a report that shows the results of the
prerequisite validation.
Prerequisite validation
is also built into Setup. Therefore, the same prerequisites are validated when
you install a component by using the Setup wizard.
Note
The prerequisite
validation utility validates the software prerequisites that Microsoft Dynamics
AX depends on. However, the utility does not verify whether Microsoft Dynamics
AX components that are also required are installed or configured. For example,
the utility verifies whether a supported version of Windows is installed, but
does not verify whether an Application Object Server (AOS) is running in the
environment. Prerequisite Microsoft Dynamics AX components are validated when
you run Setup.
To review the hardware
and software requirements for Microsoft Dynamics AX, see the system
requirements on Microsoft.com.
Use the following
procedure to run the prerequisite validation utility.
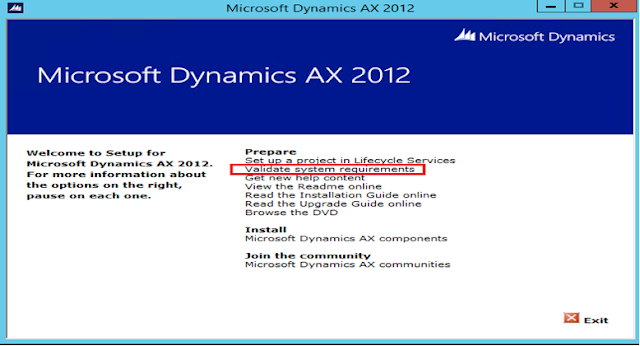
1. Start Microsoft Dynamics AX Setup.
2. Under Prepare,
click Validate system requirements.
Note
To avoid errors, run
only one instance of the utility at a time.
3. The Prerequisite
validation page is displayed. Select the components that you plan to
install on the local computer, and then click Next.
Prerequisite
validation results page
is displayed. Each prerequisite is assigned one of the following statuses.

5.
For more information about a prerequisite, click its status. For information
about all the prerequisites that were validated, click View report to
display the Microsoft Dynamics AX Prerequisite check report. Both
options provide a description of the prerequisite, the validation status, and
recommendations for resolving any problems.
6.
Resolve prerequisite issues. For many errors and warnings, the prerequisite
validation utility can attempt to resolve the issue for you.
If a link is available in the
Download column, click it to download and install the missing
prerequisite. Internet access is required to download some prerequisites that
are not included on the installation media. In some cases, the download starts
immediately when you click the link. In other cases, a download page is
displayed when you click the link.
Note
If network or computer security
prevents a prerequisite from being downloaded from the utility, you must
download the prerequisite by using another method. Click the Error link on the
prerequisite validation page to obtain the download URL.
If a check box is available
in the Configure column, select it, and then click the Configure button
to resolve the issue.
Some prerequisites depend on
other prerequisites. In these cases, the prerequisites must be installed or
configured in a specific order. For example, the Windows Search Service must be
installed before it can be started.
7.
After you have resolved prerequisite issues, click Revalidate to run the
prerequisite validation again.
8. When you have finished
validating prerequisites, click Close.
Important
Prerequisite software that is installed or configured by the
prerequisite validation utility may not include the latest updates. We strongly
recommend that you run Windows Update to identify and install the latest
updates before you continue with the installation of Microsoft Dynamics AX.
1.
Install
the Microsoft Dynamics AX databases
1.
Start Microsoft Dynamics AX Setup. Under Install, select Microsoft
Dynamics AX components.
2. Advance through the first wizard pages.

3. The License terms
page opens, select accept the license terms check box and click Next (This
page opens only if you run)

4. The Customer
Experience Improvement Program page opens, select what fits you and click Next
(This page opens only if
you run installation for the first time)

5. The Select a file location page opens. I leave the default File Location value (C:\Program Files\Microsoft Dynamics AX \60) (This page opens only if you run installation for the first time)

6. The Ready to install
page opens. Click the Install Setup will install the support files.
(This page opens only if you run installation for the first time)

7. The Select an
installation option page opens. Select Microsoft Dynamics Ax radio
button and click Next.

8. The Select installation type page opens. To see what will be installed, select the Custom installation type radio button.

9. On the Select components page,
select Databases, and then click Next.

10. On the
Prerequisite validation results page, resolve any errors. For more
information about how to resolve prerequisite errors, when no errors remain, click Next.

11. On the Select
databases page, select whether you want to create new databases by using
Setup, or whether you want to configure existing databases. If you are
upgrading, you should select to configure existing databases.

12. If you want Setup
to create the databases, on the Create new databases page, in the Server
name list, select the name of the computer that runs SQL Server. Provide
database names or accept the default database names. By default, the
transaction database is named MicrosoftDynamicsAX. The baseline database is
optional. By default, the baseline database is named
MicrosoftDynamicsAX_baseline.
If you created the
databases manually, or if you are upgrading a database, on the Configure
existing databases page, select the name of the computer that runs SQL
Server, and then select the names of the existing databases that you want to
configure.
Important
The database name must
not include any spaces or any of the following characters: backslashes (\),
slashes (/), periods (.), commas (,), colons (:), brackets ([ ]), parentheses
(( )), or hyphens (-). For more information about characters that are allowed
by SQL Server, see the Identifiers topic on MSDN.
Click Next.

13. On the Select additional
models page, select models in the Available Models list. Setup lists
all the models that are contained in the Models folder and its subfolders.
Required models are selected by default, and you cannot clear the selection. Click
Next to continue.

14. On the Prerequisite
validation results page, resolve any errors. When no errors remain, click Next.

15. On the Ready to install page, click Install.

16. After the
installation is completed, click Finish to close the wizard.

3. Install an Application Object Server (AOS) instance
The Application Object Server (AOS) is a Windows service that controls
communications among Microsoft Dynamics AX clients, databases, and
applications.
Install an AOS instance
This section describes how to install an Application Object Server
(AOS) instance for Microsoft Dynamics AX 2012
Before you install the AOS instance
On the computer where you will
install the AOS instance, run the prerequisite validation utility to verify
that system requirements have been met. For information about how to run the
prerequisite validation utility.
Select a service account for
the AOS service. Before you install an AOS instance, you must determine which
account you want the AOS service to run as. The AOS service can run as a domain
account, as a managed service account, or as the Network Service account of the
computer that you install the AOS service on.
Install an AOS instance
1.
Start Microsoft Dynamics AX Setup. Under Install, select Microsoft
Dynamics AX components.
2.
Advance through the initial wizard pages.
3.
If the Setup Support files have not yet been installed on the computer, the Select
a file location page is displayed. The Setup Support files are required for
installation. Enter a file location or accept the default location, and then
click Next. On the Ready to install page, click Install.
4.
If you’re installing AX 2012 R3, in the Select an installation option page,
click Microsoft Dynamics AX.
5. On the Select
installation type page, click Custom installation, and then click Next.
6. On the Select components page,
select Application Object Server (AOS), and then click Next.

7. On the Prerequisite
validation results page, resolve any errors. For more information about how
to resolve prerequisite errors,

8. On the Connect to the
databases page, in the Server name box, type or select the name of
the Microsoft SQL Server computer. In the Database name box, select the
name of the Microsoft Dynamics AX transaction database. Optionally, select the
name of the baseline database.

|
Purpose
|
Default
|
|
TCP/IP port
|
Used by other Microsoft
Dynamics AX components to communicate with AOS.
|
2712
|
|
Services WSDL port
|
Used by external applications
to access the WSDL for AOS-based Microsoft Dynamics AX Web services.
|
8101
|
|
Services endpoint port
|
Used by external applications
to access AOS-based Microsoft Dynamics AX Web services.
|
8201
|

10. On the Specify an AOS
account page, select the Network Service account of the local computer
(recommended only for development environments), a managed service account, or
a domain account for the AOS service. If you select to use a managed service
account, make sure to specify the account in the format Domain\AccountName$.

12. On the Prerequisite
validation results page, resolve any errors. When no errors remain, click Next.

13. On the Ready to install page,
click Install.

14.
After the installation is complete, click Finish to close the wizard.

The AOS service can take several minutes to start the first time after
it is installed. To determine whether the AOS service has started, click Administrative
tools > Services, and review the status of the Microsoft
Dynamics AX Object Server service.
Start the AOS Windows
service
After you install an AOS
instance, you must wait for the Microsoft Dynamics AX Object Server Windows
service to start.
By default, if a Windows service takes longer than 30 seconds to start,
the system displays a message informing you that the service did not respond to
a start command. The AOS Windows service can take longer than 30 seconds to
start, and the lack of a response in 30 seconds can cause the service to stop.
Therefore, if an AOS instance repeatedly does not start, you may want to
configure the registry to give Windows services more time, such as 120 seconds,
to start before the error message is displayed.
4.
Install
Reporting Services extensions for Microsoft Dynamics AX
Before you install the Reporting Services extensions
Assign system service accounts to the appropriate
Active Directory groups
Identify which accounts are
used for the following purposes:
·
The account used
to run the Microsoft Dynamics AX Application Object Server (AOS)
·
The account used
as the Business Connector proxy
Assign the accounts listed
above to the following Active Directory groups on the domain server:
·
Windows
Authorization Access group
·
Pre-Windows 2000
Compatibility Access group
1.
Installation
steps:
On the Select installation type page, select
Custom installation. Click Next. On the Select components page, follow these
steps:
a.
Select the
Reporting Services extensions check box. When you select the option to install
the Reporting Services extensions, the management utilities are automatically
selected for installation,
b.
A message is displayed that states that you
must complete the code upgrade checklist if you are upgrading. Click OK.
c.
Click Next.

a.
Click Next.

2. Install
prerequisites:
Install prerequisites On the computer where Reporting Services is installed, or
where you plan to install Reporting Services, run the prerequisite validation
utility to verify that system requirements have been met.
On the Prerequisite Validation page, resolve
any errors. For more information about how to resolve prerequisite errors, see
the Check prerequisites section. When no
errors remain, click next.

3. Configuration files locations:
On the Specify a
location for configuration settings page, specify whether you want the
Reporting Services extensions to access configuration information from the
registry on the local computer or from network.

4. On the Specify a
Reporting Services instance page, select the name of the Reporting Services
instance.
Click Next.

5. Click Finish to close
the Setup wizard.

Run Setup from shared location path is = \\x.x.x..34\Soft\AX R3\AX 2012 R3 CU8
5. Configure
Analysis Services by running Setup
This procedure assumes
that you are configuring Analysis Services on a dedicated server where no
Microsoft Dynamics AX components are installed. If you are installing other
Microsoft Dynamics AX components at the same time, the installation pages vary,
depending on the components that you are installing.
1. If you’re installing
AX 2012 R3, in the Select an installation option page, click Microsoft Dynamics
AX.
. On the Select
installation type page, select Custom installation. Click Next.
. On the Select
components page, follow these steps:
·
Select the Analysis Services configuration check
box.
We recommend that you select the Management utilities check box so
that you can deploy cubes by using Windows PowerShell commands

2. On the Prerequisite
Validation page, resolve any errors. For more information about how to resolve
prerequisite errors, see the Check prerequisites section. When no errors
remain, click Next.

3. On the Specify an
Analysis Services instance page, select an instance of Analysis Services. Click
Next.

4. On the Connect to a SQL Server Database
page, follow these steps:
- · Select the computer that hosts your Microsoft Dynamics AX online transaction processing (OLTP) database.
- · Select the Microsoft Dynamics AX OLTP database.
- · Click Next

5. On the Prerequisite
Validation page, resolve any errors. When no errors remain, click Next.

6. On the Ready to
install page, click Install.
7. Click Finish to close the Setup wizard

6.
Install
.NET Business Connector:
Use this procedure to
install .NET Business Connector. If you install other Microsoft Dynamics AX
components at the same time, the installation pages vary, depending on the
components that you are installing.
1.
Start Microsoft Dynamics AX Setup. Under
Install, select Microsoft Dynamics AX components.
2.
Advance through the first wizard pages.
3.
If you’re installing AX 2012 R3, in the Select
an installation option page, click Microsoft Dynamics AX.
4.
On the Select installation type page, click
Custom installation, and then click Next.
5.
On the Select components page, select .NET
Business Connector, and then click Next.

6. On the Prerequisite validation
results page, resolve any errors. For more information about how to resolve
prerequisite errors, see the Check prerequisites section. When no errors
remain, click Next.

7. On the Ready to
install page, click Install.

8. After the installation
is completed, click Finish to close the wizard.

7.
Install
a client
1.
Start Microsoft Dynamics AX Setup. Under
Install, select Microsoft Dynamics AX components.
2.
On the Select installation type page, click
Custom installation, and then click Next.
3.
On the Select components page, select Client,
and then click Next.

4. On the Prerequisite validation results page, resolve any errors. For more information about how to resolve prerequisite errors, see the Check prerequisites section. When no errors remain, click Next.

5. On the Select client
preferences page, select the display language that is used in the client, and
specify whether you want Setup to create a desktop shortcut for the client.
Additionally, select one of the following installation types:
·
Business user – The basic client is installed.
This type of client installation is appropriate for most users.
·
Developer – The client, the developer workspace,
and additional files that are required for development tasks are installed.
·
Administrator – The client and additional files
that are required for administrative tasks are installed. Administrative tasks
include the deployment of artifacts and the creation of users. Click Next.

6. On the Specify a
location for configuration settings page, specify whether you want the client
to access configuration information from the registry on the local computer or
from a shared configuration file. Click Next.

7. On the Connect to an
AOS instance page, enter the name of the computer that runs the AOS instance
that you want to connect to.

8. On the Prerequisite
validation results page, resolve any errors. When no errors remain, click Next.

9. On the Ready to
install page, click Install.

10. After the
installation is completed, click Finish to close the wizard.

8.
Install
the version of the Data Import/Export Framework that is available in AX 2012 R3
Components of the Data Import/Export Framework
must be installed as follows:
·
The Data Import/Export Framework service must be
installed on a computer that is running SQL Server Integration Services.
·
The Data Import/Export Framework server must be
installed on a computer that is running an instance of Microsoft Dynamics AX
Application Object Server (AOS).
·
The Data Import/Export Framework client must be
installed on a computer that is running the Microsoft Dynamics AX client.
1.
Start Microsoft Dynamics AX Setup. Under
Install, select Microsoft Dynamics AX component
2.
On the Select components page, select the
appropriate component for the computer that you are installing to, and then
click Next:
3.
On the computer that is running SQL Server
Integration Services, select Data Import/Export Framework (DIXF) service.

4. A prerequisite
validation check runs. Address any issues that the prerequisite check finds
outside the installer, and then restart the validation check. When all
prerequisites have been found, click Next

5. If the wizard
displays the Configure the Data Import/Export Framework service page, specify a
service account. We recommend that you use the same service account as that
used for the AOS service. Click Next

6. Another prerequisite
validation check might run. Address any issues that the prerequisite check
finds outside the installer, and then restart the validation check. When all
prerequisites have been found, click Next.

7. On the Ready to
install page, click Install

8. On the Setup was
completed successfully page, click Finish.

1. On
the AOS instance, select AOS component. A
restart of the AOS service is required as part of the
installation

2. A prerequisite validation check runs. Address any issues that the prerequisite check finds outside the installer, and then restart the validation check. When all prerequisites have been found, click Next

3. If the wizard
displays the Configure the Data Import/Export Framework extensions page,
specify the name of the server that runs the Data Import/Export Framework
service. Click Next

4. Another prerequisite
validation check might run. Address any issues that the prerequisite check
finds outside the installer, and then restart the validation check. When all
prerequisites have been found, click Next.

5. On the Ready to
install page, click Install.

6. On the Setup was
completed successfully page, click Finish.

g Run Setup from shared location path is = \\x.x.x.34\Soft\AX R3\AX 2012 R3 CU8

1. On the client computer, select Client component.

2. A prerequisite
validation check runs. Address any issues that the prerequisite check finds
outside the installer, and then restart the validation check. When all
prerequisites have been found, click Next.

3. If the wizard
displays the Configure the Data Import/Export Framework extensions page,
specify the name of the server that runs the Data Import/Export Framework
service. Click Next.

4. Another prerequisite
validation check might run. Address any issues that the prerequisite check
finds outside the installer, and then restart the validation check. When all
prerequisites have been found, click Next.

5. On the Ready to
install page, click Install.

6. On the Setup was
completed successfully page, click Finish.

Run Setup from shared location path is = \\x.x.x.34\Soft\AX R3\AX 2012 R3 CU8
9.
Install
Enterprise Portal on a single server
1. Start Microsoft Dynamics AX Setup. Under Install, select
Microsoft Dynamics AX components.
2. Advance through the first wizard pages.
3. If the Setup Support files have not yet been installed on
the computer, the Select a file location page is displayed. The Setup Support
files are required for installation. Enter a file location or accept the
default location, and then click Next. On the Ready to install page, click
Install.
4. If you’re installing AX 2012 R3, in the Select an
installation option page, click Microsoft Dynamics AX. 5. On the Select
installation type page, click Custom installation, and then click Next.
6. On the Select components page, select Enterprise Portal
(EP),

7. And then click Next

8. On the Prerequisite validation results page, resolve any
errors. For more information about how to resolve prerequisite errors, see the
Check prerequisites section. When no errors remain, click Next.

9. On the Specify Business Connector proxy account
information page, enter the password for the proxy account that is used by the
.NET Business Connector. Click Next.

10. On the Configure a Web site for Enterprise Portal page,
select a website. If no websites are available in the list, you must cancel
Setup, create a website by using SharePoint Central Administration, and then
try the installation again.
We recommend that you select the Configure for Windows
SharePoint Services option


11. On the Prerequisite validation results page, resolve any
errors. When no errors remain, click Next.

12. On the Ready to install page, click Install.

13. After the installation is complete, click Finish to
close the wizard

Run Setup from shared location path is =
\\x.x.x.34\Soft\AX R3\AX 2012 R3 CU8
10.
Install
Retail Headquarters components in AX 2012 R3
Start Microsoft Dynamics
AX Setup.
Under Install, select Microsoft Dynamics AX
components.
2. Advance through the
first wizard pages.
3. On the Modify Microsoft Dynamics AX
installation page, click Add or modify components, and then click Next.
4. On the Add or modify
components page, select Retail headquarters, and then click Next.

On the Prerequisite
validation results page, resolve any errors. For more information about how to
resolve prerequisite errors, see the Check prerequisites section. When no
errors remain, click Next.

On the Ready to install
page, click Install.


After the installation
is completed, click Finish to close the wizard.

Run Setup from shared location path is = \\x.x.x.34\Soft\AX
R3\AX 2012 R3 CU8
11.
Install
Retail POS
Before
you install Retail POS
On the computer where
you plan to install this component, run the prerequisite validation utility to
verify that system requirements have been met. For information about how to run
the prerequisite validation utility, check
prerequisites.
1. Start Microsoft
Dynamics AX Setup. Under Install, select Microsoft Dynamics AX components.
2. Advance through the first wizard pages.
3. If the Setup Support
files have not yet been installed on this computer, the Select a file location
page is displayed. The Setup Support files are required for installation. Provide
a file location or accept the default location, and then click Next. On the
Ready to install page, click Install.
4. If you’re installing AX 2012 R3, in the
Select an installation option page, click Microsoft Dynamics AX. 5. On the
Select installation type page, click Custom installation, and then click Next.
6. On the Select
components page, select Retail POS, and then click Next.

7. On the Prerequisite
validation results page, resolve any errors. For more information about how to
resolve prerequisite errors, see the Check prerequisites section. When no
errors remain, click Next.

On the Ready to install
page, click Install.


After the installation
is completed, click Finish to close the wizard.

12.
Install
Commerce Data Exchange: Async Server
1. Start Microsoft
Dynamics AX Setup. Under Install, select Microsoft Dynamics AX components.
2. Advance through the
first wizard pages.
3. If the Setup Support
files have not yet been installed on this computer, the Select a file location
page is displayed. The Setup
Support files are required for installation. Provide a file location or accept
the default location, and then click Next. On the Ready to install page, click
Install.
4. On the Select an
installation option page, click Microsoft Dynamics AX.
5. On the Select
installation type page, click Custom installation, and then click Next.
6. On the Select
components page, select Async Server, and then click Next.

2. On the Prerequisite
validation results page, resolve any errors. For more information about how to
resolve prerequisite errors, see the Check prerequisites section. When no
errors remain, click Next.

3. On the Configure
Async Server page, select the check box to configure Async Server by using
Setup. If you clear this check box, the application files are installed, but
Async Server is not configured. If you’re configuring Async Server, enter the
following information:
·
Application name – The name of the web
application that hosts Async Server.
·
App pool name – The name of the application pool
that the web application runs under. Website name – The name of the website
that Async Server runs on.
·
User name and Password– The credentials for the
application pool identity.
·
Microsoft Dynamics AX 2012 Installation Guide
270
·
HTTPS port – The port on which Async Server
receives HTTPS requests. You can specify any available port. Verify that the
port is open in Windows Firewall, and record the port number. The port is used
to create the URL for Async Server in the following format: https://<server
name>:port/<web application name>. This URL is required when you
configure instances of Async Client that connect to this instance of Async
Server.
·
TCP port
(optional) – The port on which Async Server receives TCP requests. Specify a
TCP port if your environment uses high-performance data synchronization. You
can specify any available port. Verify that the port is open in Windows
Firewall.
·
AOS
service user – The user account that the instance of Microsoft Dynamics AX
Application Object Server (AOS) runs as.
·
SSL certificate
thumbprint


4. On the Select a
database to use with Async Server page, create a new message database for Async
Server. If you install a subsequent instance of Async Server for load
balancing, you must select the same message database

5. On the Prerequisite
validation results page, resolve any errors. For more information about how to
resolve prerequisite errors, see the Check prerequisites section. When no
errors remain, click Next.

6. On the Ready to
install page, click Install.


7. After the
installation is completed, click Finish to close the wizard.

Run Setup from shared
location path is = \\x.x.x.34\Soft\AX
R3\AX 2012 R3 CU8
13.
Install
Retail SDK
1.Start Microsoft
Dynamics AX Setup. Under Install, select Microsoft Dynamics AX components.
2. Advance through the
first wizard pages.
3. If the Setup Support
files have not yet been installed on this computer, the Select a file location
page is displayed. The Setup Support files are required for installation.
Provide a file location or accept the default location, and then click Next. On
the Ready to install page, click Install.
4. If you’re installing
AX 2012 R3, in the Select an installation option page, click Microsoft Dynamics
AX. 5. On the Select installation type page, click Custom installation, and
then click Next.
6. On the Select
components page, select Retail SDK, and then click Next.

7. On the Prerequisite
validation results page, resolve any errors. For more information about how to
resolve prerequisite errors, see the Check prerequisites section. When no
errors remain, click Next.

8. On the Ready to
install page, click Install.

9. After the
installation is completed, click Finish to close the wizard.

14.
Install
Commerce Data Exchange: Async Client
1. Start Microsoft
Dynamics AX Setup. Under Install, select Microsoft Dynamics AX components.
2. Advance through the
first wizard pages.
3. If the Setup Support
files have not yet been installed on this computer, the Select a file location
page is displayed. The Setup Support files are required for installation.
Provide a file location or accept the default location, and then click Next. On
the Ready to install page, click Install.
4. On the Select an
installation option page, click Microsoft Dynamics AX.
5. On the Select
installation type page, click Custom installation, and then click Next.
6. On the Select
components page, select Async Client, and then click Next.

7. On the Prerequisite
validation results page, resolve any errors. For more information about how to
resolve prerequisite errors, see the Check prerequisites section. When no
errors remain, click Next.

8. On the Configure
Async Client page, select the check box to configure Async Client by using
Setup. If you clear this check box, the application files are installed, but
Async Client is not configured. If you’re configuring Async Client, enter the
following information:
·
Async Server URL – The URL for the instance of
Async Server. Typically, the URL is in the format https://<server
name>:port/<web application name>. If Async Server is installed in a
cluster that has a load balancer, enter the URL to the service on the load
balancer.
·
Channel database ID – The identifier in
Microsoft Dynamics AX for the channel database that is used by the selected
instance of Async Client.
·
User name and Password (Async Server connection)
– The credentials for the user that connects to Async Server. These credentials
must match the credentials that are specified in the channel database profile.
Credentials are case sensitive. The credentials are used to identify and
authenticate Async Client.
·
User name and Password (Async Client) – The
credentials for the user that runs the Windows service for Async Client. The
user does not have to be a domain account. The user can be a member of a
workgroup on the local computer. Credentials are case sensitive. Optionally,
click Test connection to verify that Async Client is configured correctly. For
information about how to troubleshoot errors that you might encounter, see
Troubleshoot issues in Async Server or Async Client on TechNet. Click Next.

9. On the Select or
specify a database to use with Async Client page, enter server and database
information for the message database and the channel database that will be used
by Async Client. Then click Next. You can connect to an existing channel
database only. Setup does not create a new channel database if you enter a
channel database name that doesn’t exist. If you specify a message database
name that doesn’t exist, Setup creates a new message database.

10. On the Prerequisite
validation results page, resolve any errors. For more information about how to
resolve prerequisite errors, see the Check prerequisites section. When no
errors remain, click Next.

11. On the Ready to
install page, click Install.

12.After the
installation is completed, click Finish to close the wizard.


Comments
Post a Comment